


Renter-Friendly Mounting: No-Drill Options for Leased Floors
Renting can feel limiting when you want to display wall art, canvas prints, and artwork that makes your space feel like yours. Many leases discourage drilling, and landlords often expect walls and surfaces to be left in the same condition at move-out. The good news is that you can still hang canvas art and art prints with methods that rely on removable systems, stable supports, and smart placement.
This guide covers no-drill mounting options designed for renters. You’ll learn what works on common wall finishes, how to choose the right method based on weight, and how to remove everything cleanly when it’s time to move. If you’re styling your space with a canvas print, a framed art print, or large wall art, these tips help you do it with less risk.
What “No-Drill” Mounting Means in a Rental
No-drill mounting means you avoid making holes in surfaces you don’t own. That includes walls, trim, tile, and even surfaces close to the floor where scuffs are easy to spot. Most renter-safe systems fall into three groups: removable adhesives, compression-based supports, and freestanding displays. Each group has strengths, and the best choice depends on surface type and the weight of your wall hanging.
Know your surface before you start
Painted drywall is usually the easiest surface for removable adhesive strips. Textured walls can be harder because the adhesive has less contact area. Tile, glass, and metal can work well if they’re clean and dry. Brick and rough concrete often need freestanding or compression-based systems instead of adhesives.
Weight ratings are not optional
Every adhesive strip or hook has a weight limit, and that limit assumes correct surface prep and correct installation. A large print or large wall art piece often needs multiple strips or a different approach. If you’re unsure, plan for extra support rather than pushing the limit.
No-Drill Options at a Glance
- Removable adhesive strips: Great for lightweight to medium wall art and many canvas prints when applied correctly.
- Adhesive hooks and hangers: Useful for framed art prints with wire or sawtooth hangers.
- Freestanding stands and leaning displays: Ideal for large wall art when you want zero wall contact.
- Tension-based supports: Good for display rails or hanging systems without hardware.
- Picture ledges with no-drill support: A flexible way to rotate artwork without repeated mounting.
Plan First: Layout, Height, and Surface Prep
Renter-friendly mounting is won or lost in the planning stage. Before you open a pack of adhesive strips, set your layout. Use paper templates, painter’s tape, or a simple pencil mark (if allowed) to test spacing and alignment. For multi-piece wall decor, measure the gaps so the set looks intentional rather than random.
Surface prep checklist
- Wipe the area with a clean, dry cloth to remove dust.
- If the manufacturer allows it, use a small amount of rubbing alcohol on a cloth and let the wall fully dry.
- Avoid placing adhesive on freshly painted walls until the paint has fully cured.
- Press firmly for the recommended time so the adhesive bonds to the surface.
These steps sound basic, but they reduce common issues like slipping, tilted frames, and paint pull-off during removal.
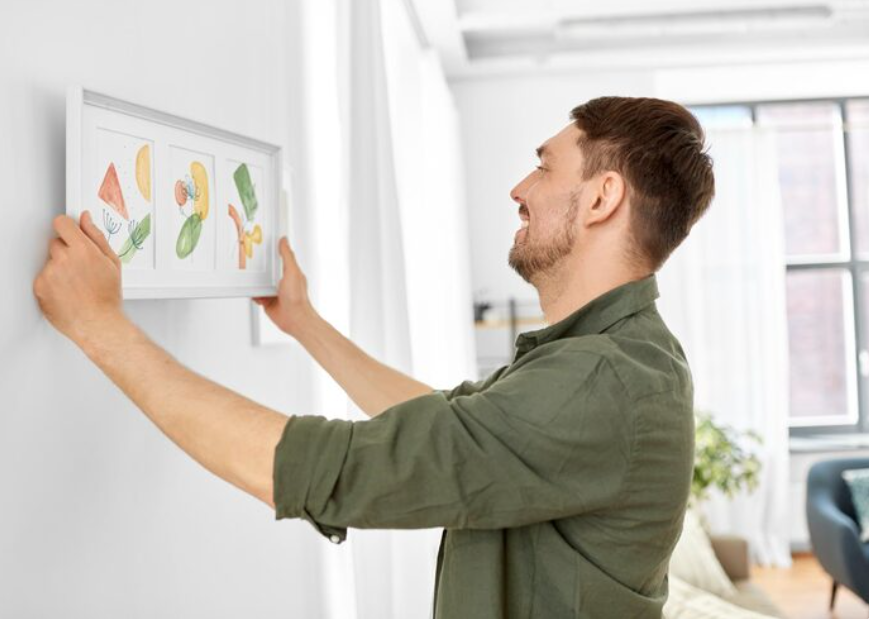
Option 1: Removable Adhesive Strips
Removable adhesive strips are a go-to solution for renters because they can hold a canvas print or a lightweight framed art print without holes. The key is using enough strips and placing them where they share the load evenly.
How to choose the right strip setup
Start with the piece’s weight, then choose strips rated above that weight. For wider canvas art, use strips at the top corners and add extra strips near the lower corners to limit pivoting. If the art has depth (like a stretched canvas), choose strips that work well with a small gap from the wall.
Step-by-step installation
Apply the strip pairs to your frame or canvas first, then press the piece to the wall. Hold steady pressure as directed by the product instructions. Many systems also suggest a “set time” before you add full load. Follow that guidance, especially for large art print formats.
Clean removal that protects paint
When it’s time to remove, pull the tab slowly in the direction recommended by the strip maker. Do not yank outward. Slow, steady pulling helps the adhesive stretch and release.
Option 2: Removable Hooks and Adhesive Hangers
Adhesive hooks and hangers are helpful when your art print has a wire, D-rings, or a sawtooth hanger. They allow a single hanging point, which can make leveling easier. For heavier pieces, choose a hanger rated for the load and consider two hooks to reduce swing.
How to stop wobble
If your wall art shifts when doors close or people walk by, add small rubber bumpers (or felt pads) on the lower corners of the frame. That extra friction helps keep the artwork straight.
Option 3: Leaning Displays and Freestanding Supports
If you want a zero-risk approach, use the floor. Leaning a canvas print on a sturdy surface or placing paintings on a freestanding stand avoids adhesives and hardware entirely. This approach is also useful for extra large art where adhesive systems become less predictable.
For a clean look, pick a piece with strong contrast and clear shapes. If you like a pared-back style, explore minimalist canvas prints that read well even when displayed lower on the wall or supported from below.
Safety tips for leaning art
Use anti-slip pads under the bottom edge, and place corner bumpers where the top touches the wall. If you have pets or heavy foot traffic, choose a stand with a wider base and consider placing the piece away from pass-through areas.
Option 4: Tension-Based Supports
Tension rods and floor-to-ceiling tension poles use compression rather than screws. They can support lightweight display rails, string lines, or clip systems that hold small art prints. They’re also good when wall texture makes adhesive unreliable.
How to avoid marks
Add soft pads at contact points, and check tension over time. Temperature and humidity shifts can change pressure slightly, so a quick monthly check is a smart habit.
Option 5: Picture Ledges Without Drilling
Picture ledges let you rotate wall hangings often, which reduces repeated mounting and removal. Some renters use freestanding ledges, while others pair a slim ledge with removable mounting methods that distribute weight along the ledge rather than one point.
If your wall decor plan changes with seasons or mood, ledges make it easy to swap a canvas print, add a smaller art print in front, or layer pieces for depth.
How to Choose the Best Method for Canvas Prints
Canvas prints are often lighter than framed glass pieces of the same size, which makes them a solid match for removable systems. Still, size matters. A wide canvas print can torque forward if it’s mounted at only two points. Spread support across multiple points, and keep the surface clean and dry.
If you’re selecting new artwork with renter-friendly mounting in mind, focus on pieces that work well with multi-point support. Styles with bold shapes and clean lines can look strong even with simpler display setups. If you want a statement look that still works with renter-safe hanging, browse abstract wall art canvas prints that suit both small and large wall art layouts.
Move-Out Day: Remove Everything Cleanly
Clean removal is part of renter-friendly decorating. The goal is to leave surfaces smooth, unmarked, and easy for the next tenant or fresh paint.
Move-out removal checklist
- Remove artwork first, then remove strips, hooks, and pads.
- Pull adhesive tabs slowly and in the recommended direction.
- Wipe the area with a dry cloth after removal to pick up residue.
- If minor residue remains, follow the adhesive maker’s safe cleanup method for painted walls.
Common Problems and Quick Fixes
The adhesive won’t hold
This is often caused by wall texture, dust, or moisture. Try a different placement area, use more strips, or switch to a freestanding solution if the wall finish is too rough for adhesives.
The art tilts over time
Use two hanging points when possible. Add corner bumpers or felt pads to reduce sliding. For wider pieces, add extra lower supports to limit pivoting.
You’re worried about paint pull-off
Choose removable systems designed for painted walls, avoid placing strips on weak paint, and remove slowly. If the wall has older paint layers, consider tension supports or floor-based displays instead of adhesives.
Wrap-Up
You can display wall art, canvas prints, and modern art in a rental without drilling if you match the method to the surface and weight. Removable adhesive strips and hooks work well when applied correctly. Freestanding stands and leaning displays offer the lowest risk. Tension-based supports and ledges add flexibility when you want to change your artwork often.
Pick one method, test it on a small piece first, and scale up. With a careful plan, your wall decor can look polished while keeping your lease rules intact.